Getting Started
This section provides instructions on getting started with Verto, including installation, starting Verto, various application components and concepts, and walking you through creating your first workflow.
Installation
Follow the steps below to download and install Verto on Windows.
- First, download Verto and save the ZIP archive to your local machine.
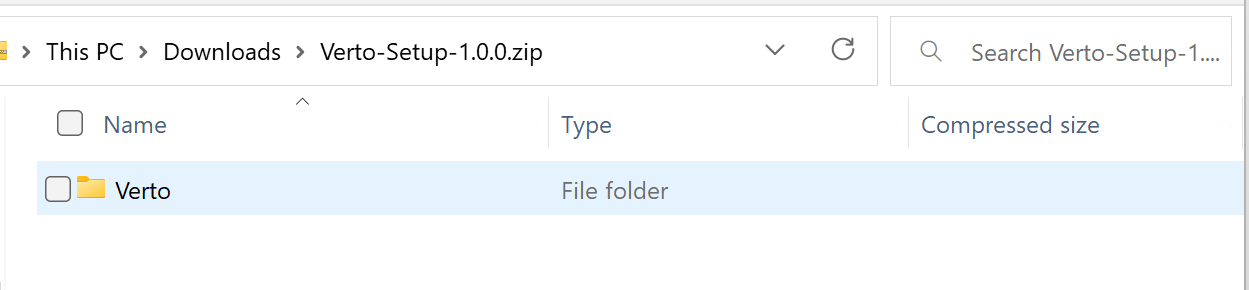
- Unzip the downloaded package into a folder where you want to store the application. This can be anywhere, but the user you will run Verto from must have access to modify files in the folder.
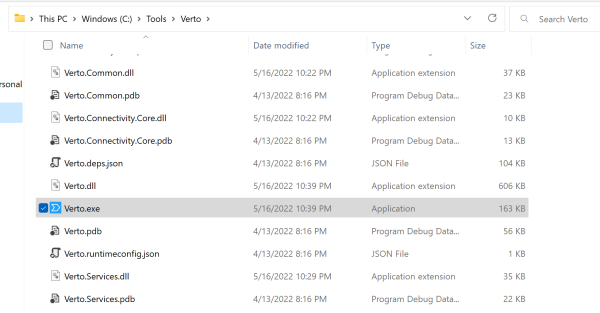
- For this example, we've placed the folder within the \Tools folder on our primary drive (C)
Starting Verto
Starting Verto is as simple as a click of a button. All settings and other configuration items are created automatically for you the first time Verto is run.
- To start Verto, run the Verto.exe application file located within the directory that you installed to in the Installation step above. You should see the following startup screen.

- The startup screen will remain visible while Verto performs some initialization activities. These include checking for version updates, verifying local settings, and loading any plugins or custom extensions.
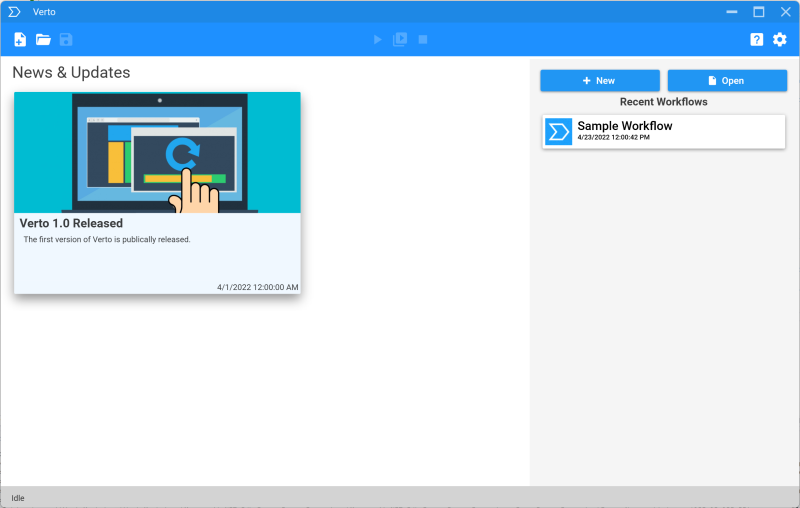
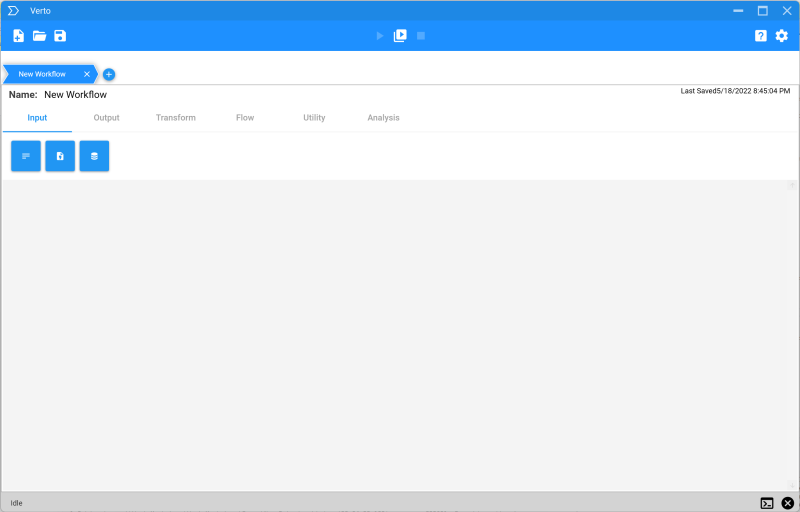
- Once this process is complete the startup screen disappears and is replaced by the home screen of Verto, which should look something like the following:
- * If the home screen does not appear or if you receive an error while the startup screen initializes, try running Verto as administrator.
Creating a Workflow
Starting Verto is as simple as a click of a button. All settings and other configuration items are created automatically for you the first time Verto is run.
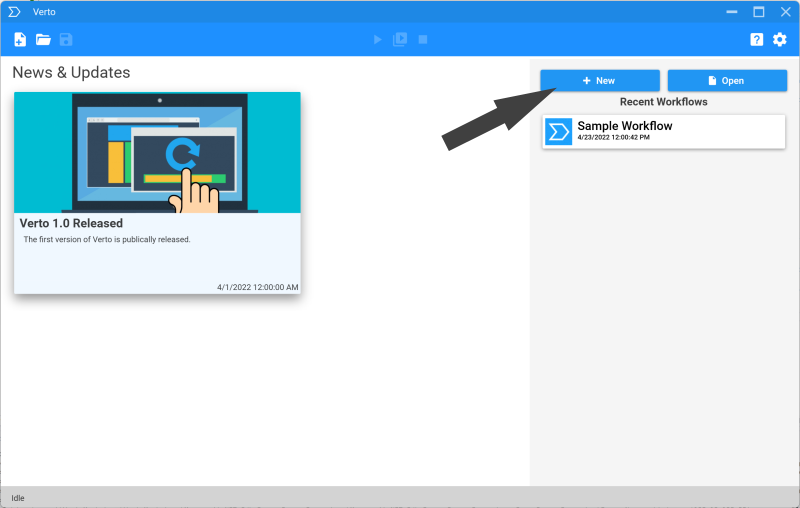
- To create a new workflow, simply click the New workflow button, located at the top right of the home screen, as shown here:
- Verto will create a new workflow instance and change views to the workflow designer view, which should look like the following
- First, we'll change the name of our newly created workflow to something more appropriate, how about My First Workflow. Click the New Workflow text located next to the Name label in the top left of the workflow designer view
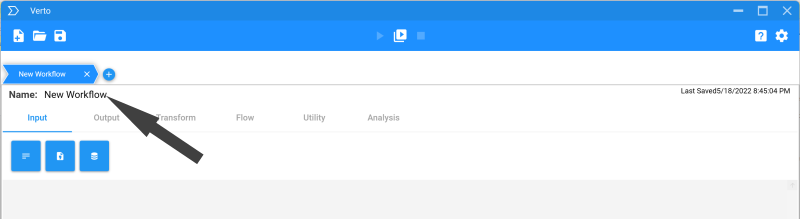
- Once you've changed the name, you can simply tab out or press enter to complete the change. Notice the name on the current workflow tab above the designer will also change to reflect the new title.
-
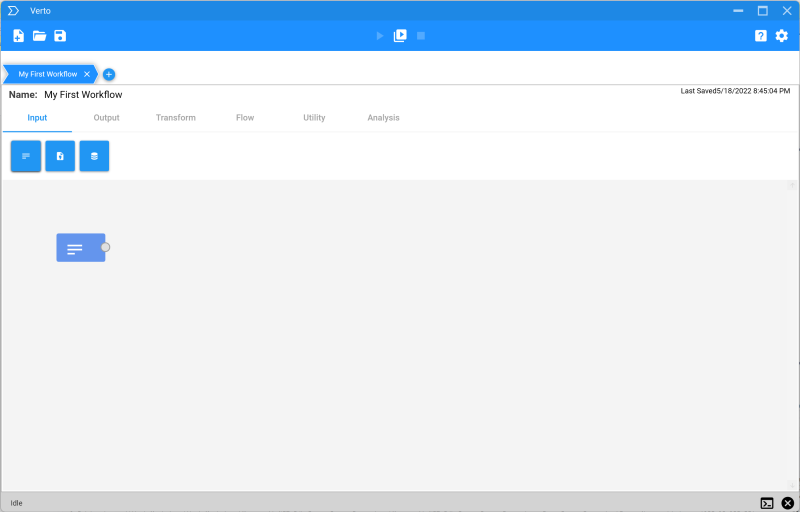
Now it's time to add some activities, which are the core of Verto's functionality. We'll start by selecting the Input activity category, located just below the workflow name we changed and then clicking the Text input activity, which looks like
 .
Once you click the activity, it will be placed on the workflow canvas. Your sceen should now look something similar to this:
.
Once you click the activity, it will be placed on the workflow canvas. Your sceen should now look something similar to this:
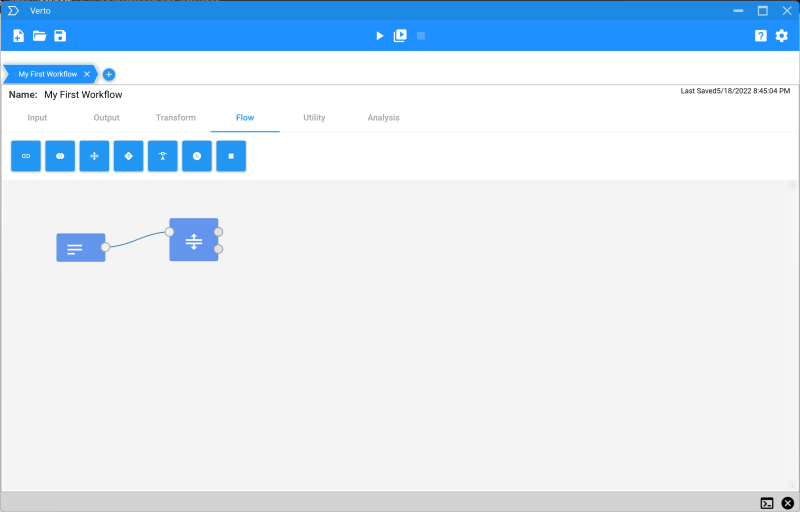
- Now that we have the Text input activity let's make the workflow a little more interesting. Change the activity toolbar to the Flow category and select the split activity which looks like
 .
. - Once the split activity is added to the canvas, click and hold the output connector node from the Text Input activity and drag it to the input connector node of the split activity. This will wire up the two activities and establish the flow of data between them.. Your sceen should now look something similar to this:
-
Next we'll create two additional activities, one that allows us to modify the data stream and the other a union activity that allows us to combine both sets back together into a single stream. First, select the union activity which looks like
 then change the activity menu to the Transform category
and select the Alter activity which looks like
then change the activity menu to the Transform category
and select the Alter activity which looks like  . Once those activities are on the canvas, wire one outbound node from the split activity to the alter and the other to the union, and then wire the outbound from the alter to the other inbound from the union.
- Your sceen should now look something similar to this:
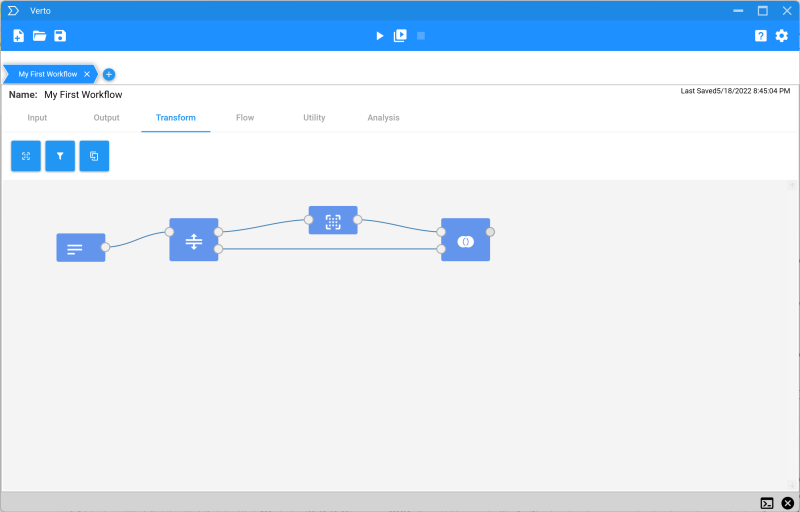
-
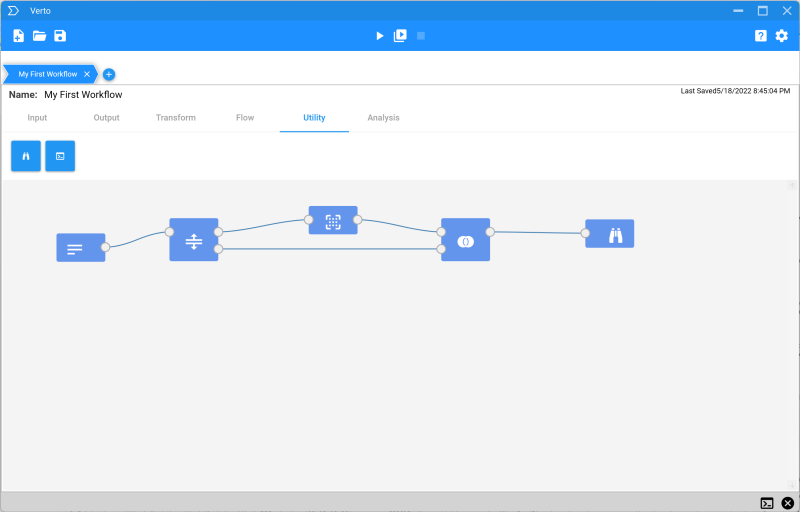
Next we'll well add one final activity, which is an observe activity. This allows us to view data within the workflow as its processed in real-time. Change the activity menu to the Utility category and and select the Observe activity which looks like
 . Wire the output of the union activity to the input of the observe activity.
Your workflow should now look like this:
. Wire the output of the union activity to the input of the observe activity.
Your workflow should now look like this:
- Adding Data
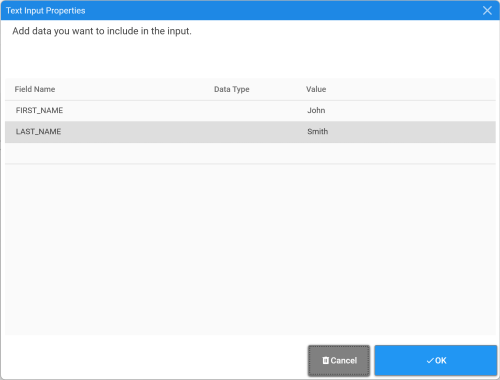
- Now it's time to add some data. Double-click the Text Input activity at the left of the workflow. This will launch a configuration window for the activity (note that not all activities have configuration options)
- Add two fields named FIRST_NAME and LAST_Name with values 'John' and 'Smith' respectively. The result should appear as follows:
- Click OK to accept the configuration and close the window.
- Next let's do something interesting. Open the configuration window for the Alter activity ()
- Within the alter activity, add a new field named FULL_NAME with the following value "[FIRST_NAME]" + " " + "[LAST_NAME]"
- The configuration should appear as follows:
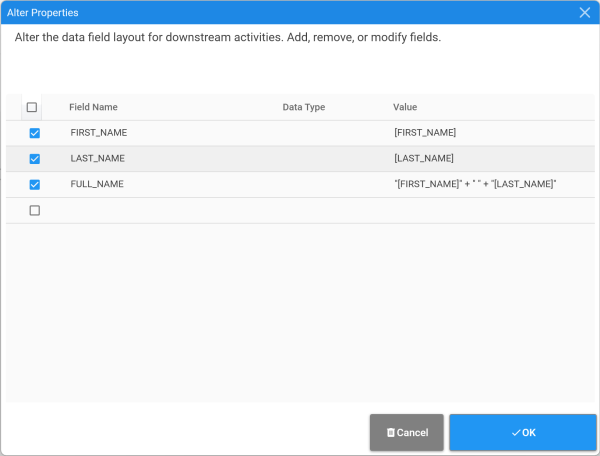
- Click OK to accept the configuration and close the window.
- Running the Workflow
- Now that we've put together our first workflow, it's time to run it and see our results. To run the workflow, click the Play icon located at the top-center of Verto. This will run the currently active workflow. In our case we only have a single workflow open.
- The workflow engine will take a second or two to initialize and then you will see the activities reflect their processing state (noted by the orange or blue dot next to them) as well as the number of records processed. An orange dot indicates an activity is actively processing data whereas a blue dot indicates one that has completed processing of all inbound data.
- Given this workflow is very simple with few steps it should complete relatively quickly. The results should appear similar to this

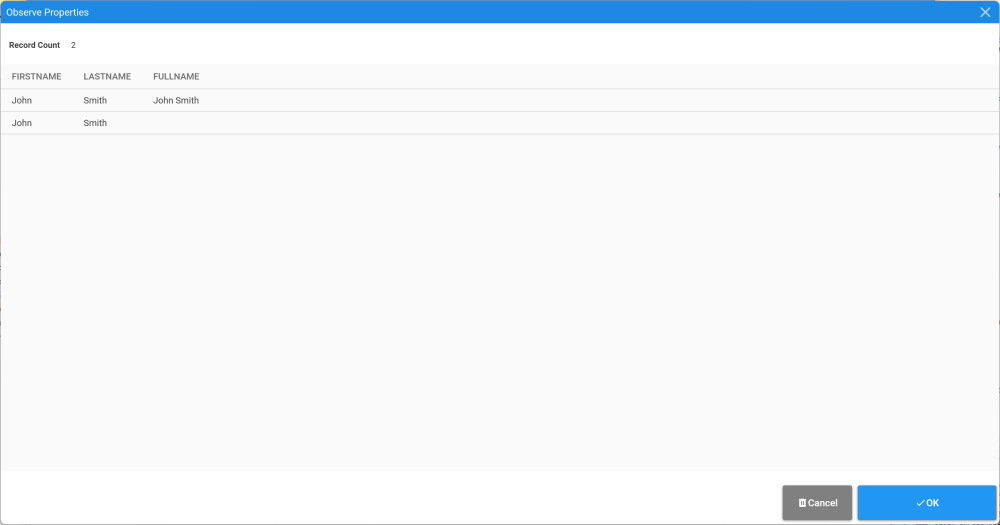
- For our last step in this tutorial we'll inspect our workflows results. Double click the Observe activity at the end of the workflow. This will open the observe activities view, which should show one record in its original state and a second record with a value in the new FULL_NAME field, with a value that is the concatenation of the FIRST_NAME and LAST_NAME fields as specified in the Alter activity. Note that we have two records, the original and the modified due to the split activity, which provides a copy of each inbound event to each path, and the union activity, which joins both paths back together to combine both copies of data. You should see something like this:
- Parting Words
- We hope this tutorial gave you the basics of getting started with Verto. More details on Verto concepts, configuration, and activity types and their uses can be found in this documentation center. So far we've only scratched the surface of what's possible with Verto. We hope you enjoy using Verto to transform your data processing workloads as much as we enjoy building it.
Activities
This section describes the various activities you can place on a workflow canvas within verto. Activities are grouped by their type and provide an overview of the activity's purpose, configuration, and general use.
Input
Input activities provide the ability to bring data into your workflow. They can be thought of as sources of data or events, with each type of source having a distinct activity type.
 Text
Text
- Activity Type: Input
- Authored: 04/01/2022
This activity is used to import statically defined text into a pipeline. Common uses of this include lists of values or reference data required within the pipeline
 Database
- Activity Type: Input
- Authored: 04/01/2022
The database Import activity provides the ability for importing data from any of the supported database technologies. Each row in the results will be published as a separate data record to the resulting processing pipeline.
 CSV
CSV
- Activity Type: Input
- Authored: 04/01/2022
The CSV Import activity provides the ability for importing CSV or other data delimited by a single character. Each row in the CSV file will be published as a separate data record to the resulting processing pipeline.
Output
Output activities provide the ability to extract data from your workflow. They can be thought of as destinations of data or events, with each type of destination having a distinct activity type.
 CSV
CSV
- Activity Type: Input
- Authored: 04/01/2022
The CSV Output activity provides the ability to write a stream of data to a specified file, using the designated delimieter (defaulting to comma)
Transform
Transform activities provide the ability to modify the structure of of your data within your workflow. They can be thought of as modifiers of data or events, with each type of modification having a distinct activity type.
 Alter
Alter
- Activity Type: Input
- Authored: 04/01/2022
This activity allows for the addition, removal, or editing of fields within the pipeline's data records. Verto expressions can be used to dynamically construct and calculate values and apply them to new fields or overwrite existing field values.
 Filter
- Activity Type: Input
- Authored: 04/01/2022
This activity provides the ability to filter the incoming stream of data based on desired filtering critera. Only records passing the filter evaluation w(true) ill continue through processing within the pipeline.
 Duplicator
- Activity Type: Input
- Authored: 04/01/2022
This activity duplicates inbound records into subsequent activities by the rate of duplication supplied. For example, if 2 is specified, each record received will produce 2 of the same records.
Flow
Flow activities provide the ability modify the flow control of your workflows. These include splitting and joining of workflow streams, unioning of sets, selecting single or specific records, and more.
 Join
Join
- Activity Type: Input
- Authored: 04/01/2022
The Join activity provides the ability to re-integrate two separate processing streams into a single stream filtered by records where the join condition is true. The resulting data record fields will be a union of both sets. Where field definitions overlap they will share a common output field.
 Union
Union
- Activity Type: Input
- Authored: 04/01/2022
The Union activity provides the ability to re-integrate two separate processing streams into a single stream with a super set of data fields for each record.
 Split
Split
- Activity Type: Input
- Authored: 04/01/2022
The split activity publishes inbound records to both connected output activities, effectively duplicating the inbound data to both resulting streams.
 Condition
- Activity Type: Input
- Authored: 04/01/2022
The condition activity evaluates the defined criteria and publishes records which return true to the first connection and those that return false to the second connection.
 Once
Once
- Activity Type: Input
- Authored: 04/01/2022
The Once acitivity provides the ability to publish a single record from any number of input records. Only the first received record will be sent to the connected activity. This is useful for triggering a task or other process that requires only a single execution.
 Delay
Delay
- Activity Type: Input
- Authored: 04/01/2022
The Delay activity provides the ability to designate a time delay between the receipt of a data record and the publication of it to the next activity. Identified in seconds or fractions of a second, each record will be paused for the specified time before continued. Useful for throttling to slow-performing processes.
 End
End
- Activity Type: Input
- Authored: 04/01/2022
This activity acts as a workflow processing terminating activity. It performs no actions against the incoming data stream.
Utility
Utility activities provide access to general functions such as copying/moving files, executing host processes, and logging/viewing of workflow processes.
 Observe
- Activity Type: Input
- Authored: 04/01/2022
This activity allows for the inspection of up to 1000 records from the inbound stream. This data is updated in real-time during pipeline processing and can be useful for visualizing upstream data and with debugging.
 Log
Log
- Activity Type: Input
- Authored: 04/01/2022
This activity allows for the logging of information to the workflow processing console.
Analysis
Analysis activities provide the ability to perform analytic functions against your data. These include aggregate functions such as Count, Sum, and Average as well as Sampling and others.
 Sampling
- Activity Type: Input
- Authored: 04/01/2022
This activity allows for the percentage based sampling of inbound activities.
Settings & Configuration
This section provides instructions on modifying various runtime settings for Verto.
Connections
Coming Soon
Frequently Asked Questions
Coming Soon